Each Spring Cleaning list has a whole lot of chores to be done. However, one of the most overlooked is cleaning the appliances in the home. According to experts, each electrical appliance should be thoroughly cleaned at least once a month to maintain its proper functions, run smoothly, and last long. If left uncleaned, our appliances can become difficult to use while some of them may even become unusable and ruined, especially the most expensive ones. Unfortunately, by the time we finally decide to squeeze appliance cleaning in our cleaning schedule, we are forced to deal with lots of accumulated dirt and grime, which, in turns, demands much of our precious time. To save yourself from this time-consuming burden, here are some easy and handy tips to ensure you get your money’s worth!

General Cleaning Tips to Keep Small & Large Appliances Working Great:
-
Clean behind your large kitchen appliances once or twice a year and the smaller ones once a week.
-
Wipe the dishwasher out with water and baking soda once in a while and then run it empty with some dish detergent.
-
Wipe up spills from the inside of the refrigerator regularly. Throw away condiments and old food and let a box of baking soda work its miracles. Place it inside and it will absorb all odors. Defrost the freezer once or twice a year and don’t forget the exterior and handles that can benefit from some cleaning with an all-purpose cleaner and a soft cloth once in a while.
-
Stuck-on spills in the microwave can be easily removed if you put a bowl of water and bring it to a boil. The evaporated water will help loosen grime and make it easier for you to wipe these spills away. Lemon peels can also do a great job there!
-
Help remove odors and dirt from the washing machine by running it with some vinegar from time to time.
-
Reduce stuck-on food burnt food particles by running the oven’s self-cleaning program. Also, wiping the kitchen’s range after each use will help prevent difficult-to-clean spots. Although most modern ovens have a self-cleaning feature, you should still clean spills with an oven cleaning spray (wear gloves), and soak the oven racks in hot soapy water and scrub them.
-
Don’t neglect cleaning your smaller appliances, such as toasters, can openers, and electric mixers on a regular basis. It will help prolong their lifespan. Most of the times, all it takes is a wipe down with some warm water and liquid soap or baking soda.
-
Depending on how often you use your coffee maker, you can run a mixture of one quart of vinegar and water through it. To do so, insert a filter into the filter basket and turn on the brew switch. Let the vinegar drip into the carafe and let it stand there for 30 minutes. Empty the carafe, rinse well, fill it with plain water, replace the filter with a new one, brew the full pot of water through the machine, and wash the carafe and filter holder right after. You can also do the same with 2 heaping spoons of baking soda.
Time to Clean:

1. A Grill
One of the most easy-to-use, convenient and relatively small grills is the George Foreman Grill. To be sure your grill (Foreman and similar) will run in tiptop shape for a really long time, here’s what you can do:
-
Disconnect the electricity so that the grilling surface cools downs.
-
Wipe the grilling surface down with some paper towels. Doing so while it’s still warm will help remove the majority of grime and grease off without sweating.
-
Wait for 20-30 minutes so that it cools down and scrape off any burnt-on food or other difficult-to-remove spills that have remained after the wiping down process, with the help of a rubber spatula. Just don’t apply too much pressure because you may damage the grilling surface or the spatula itself.
-
Damp a washcloth with warm water and a couple drops of dish soap and wash the grill, making sure the grill is not submerged in any water to avoid damage to the electronic parts of the grill. Rinse. Repeat until you have removed all the grime, dirt, and grease.
-
Let it dry completely or speed the drying process by using a soft cloth or some paper towels and let it air dry.
2. Nicotine Stains from Appliances
Years of smoking can leave a thin film of nicotine scum on everything, from walls and furniture to your kitchen appliances. To clean them, you can use:
-
Baby Wipes – Perfect to use on small appliances and excellent degreasers at the same time.
-
Window Wipes – Grab your Windex and get rid of nicotine stains. Perfect option to remove lighter encrusting of nicotine stains.
-
Degreaser – Read the instructions on the product you are bout to use first and apply the selected product to a washcloth or sponge (not directly to the appliance) and scrub until clean.
-
Magic Eraser – If your appliance needs some tough scrubbing, a magic eraser type of product will get the job done efficiently.
3. Moldy Freezer Vents
You’ll Need:
-
Bleach
-
Dishwashing soap
-
Spray bottle
-
Rubber gloves
-
Sponge
-
Soft bristled nylon brush
-
Clean rags
-
Bucket
-
Green scrubbie
Method:
-
Unplug the freezer so that you prevent possible electrocution while the freezer defrosts.
-
Empty the freezer and place the frozen items in coolers with dry ice to keep them frozen.
-
Mix 2 parts of water and 1 part bleach into a spray bottle and spray the inside of the freezer. Close the door and let it soak for 15 minutes. You can also spray the exterior of the freezer, too.
-
Mix water and regular dishwashing soap in a bucket, put on your gloves to protect them from exposure to bleach, and begin scrubbing the freezer with the help of a soft nylon brush, with a particular focus on the vents. You’ll realize that the brush can reach all the little nooks and crannies there, doing a great job cleaning the vent. Don’t be surprised if you see lots of mold coming out as you scrub the vent!
-
Do the same with the green scrubbie that will complete the scrubbing process the best possible way.
-
If you can, hose the freezer out to rinse its exterior surface. If that’s not an option, you can use a clean sponge or rag and wipe off the suds (get it wet first). Work your way from the top to the bottom and inside out.
-
Leave the door open and wipe everything dry with a clean cloth. Let the freezer air dry for a couple of hours (don’t close the door yet), even if it looks like it’s completely dry. Before you reassemble everything, make sure there are no signs of water or dampness under, in or on the freezer. Plug it in again and start storing food again.
If you follow this easy method once or twice a year, you will definitely have a whole less work to do every time you clean the freezer.
4. Appliances & Counters from Permanent Marker
Tell you a secret? Permanent markers are not that permanent and, in most cases, something as simple as alcohol on a paper towel will work beautifully on a variety of surfaces. Although somewhat difficult to remove if it sets in, you can clean your appliances and counters from permanent marker marks with a little rubbing alcohol. Just rub over the stained area and scrub a little bit to help dissolve the ink faster.
If you notice that the stain insists, soak the paper towel with the rubbing alcohol and place it on the affected area. Let it sit for 5 minutes and you are done. You may also use this tip to remove permanent ink marks from other surfaces and materials, such as a backpack.
5. Grease from Appliance Surfaces
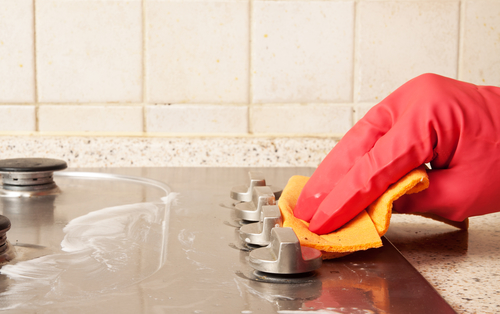
No matter how careful you are when cooking, a small portion of grease will find its way onto the surface of the appliances. To get it off, you will need to apply WD-40 and scrub the affected area with it with a brush or pad. Wash it off with some warm water and soap. Or, you could try this DIY degreaser from the following household products:
-
1 cup of dish soap
-
3 tablespoons ammonia
-
½ gallon warm water
Method:
Mix the ingredients in a bucket (or use a spray bottle and smaller doses) and apply the mixture to the greasy area. Let it soak for 5 minutes or more (depending on how persistent the stain is). Scrub the area with a scrubbing brush or pad (not a metal scrubber or you’ll scratch the surface of the appliance)and wash with soapy water. Dry with a paper towel.
Tip: Always use a product, even DIY remedies from household ingredients in an inconspicuous area before applying them on the appliance’s surface to make sure it (the surface) will react well to the chemicals.
That said, the best course of action to save you some tedious scrubbing is to make sure you wipe down your appliances with soapy water after use!
Have more homemade remedies to clean appliances? What are you using to get rid of grime and grease? Let us know!